Health & Fitness
Preparing the Perfect Pulled Pork
Preparing the perfect pulled pork can easily be managed on the backyard grill without the use of large, expensive smokers.


There is a true art to smoking foods on the backyard barbecue. The right amount of smoke, fire, seasonings and time ultimately prevail over the science of breaking down tough proteins into mouth watering morsels for the family picnic or tailgate party. Mastering those elements can be a challenge, but anyone with a hunk of meat and the ability to strike a match can easily triumph in the backyard kitchen.
Pulled pork is one such example that most people will relegate to the crock pot or (I shudder to think) opt to purchase store-bought pork already shredded and drowning in sauce. Follow these simple steps to transfer what the pros with the big smokers already know to your basic charcoal grill in the backyard.
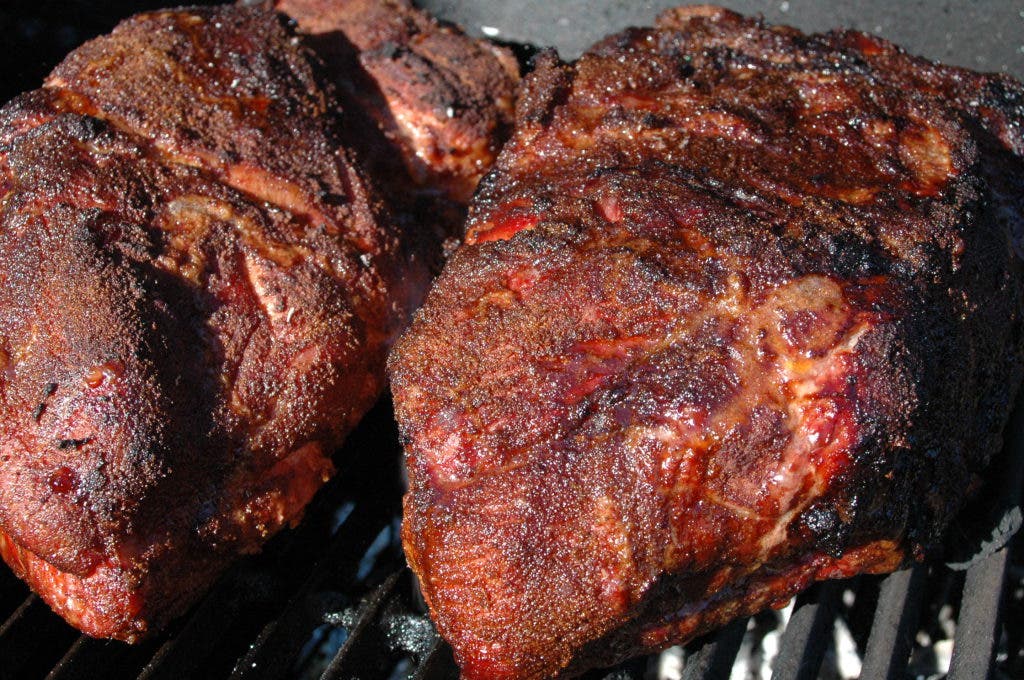
Starting with the right piece of meat is half the battle. Most pulled pork is made from the pork shoulder, also called the Boston butt. Ranging in size from 4 to 18 pounds, this can be a mammoth piece of pig, but selecting a cut in the 6-8 pound range will serve you just fine and take less time to cook (I prefer bone-in shoulders for best flavor). Make sure that your shoulder can fit under the lid of your grill first. If the meat is too large, simply cut it in half to allow it to fit. Two smaller pieces on the grill will cook in less time than one larger one and you may find it easier to handle.
Find out what's happening in Hudsonwith free, real-time updates from Patch.
Prepare the pork by rubbing it with a blend of spices. There are numerous rubs on the market and you can make your own to suit your taste. Whatever your preferences are, generously coat all sides of the meat, leaving nothing exposed. As the pork cooks, the rub will create a “bark” on the outside, sealing in the natural juices and giving you the best blend of flavors and textures. For a basic rub recipe, combine the following (adjust any ingredient to taste):
- ¼ Cup Granulated Garlic
- ¼ Cup Paprika
- ¼ Cup Brown Sugar
- 3 Tablespoons Coarse Ground Black Pepper
- 1 Tablespoon Cayenne Pepper
- 1 Tablespoon Onion Powder
Prepare the grill by heating the charcoal and banking hot coals to one side of the grill. I use only lump hardwood charcoal in everything I grill as it gives the food you prepare a natural smokiness that you cannot achieve with briquettes. If you have never used lump charcoal, make the switch now – you’ll never go back to briquettes! Lump charcoal can also be lit using a charcoal chimney (available at most stores that sell grilling equipment) and newspaper. By using the newspaper to start the fire, you eliminate the harsh flavors associated with lighter fluids. Adding some chunks of hardwood for smoke (this is essential), place the pork butts to the opposite side of the grill from the heat and replace the cover.
Find out what's happening in Hudsonwith free, real-time updates from Patch.
Managing your heat source can take a little time to master, but once you are familiar with your grill and know how much or how little to open your vents for air flow (starting with them open mid-way), you should maintain the internal temperature of your grill between 225-275°F. Keeping the butt farthest away from the flame not only allows for the pork to cook over indirect heat and not burn, it also allows you to tilt the top grate on your grill to add more hardwood as needed. During the first half of the cooking process, you want to impart smoke to the meat throughout, adding additional chunks of wood every half hour or so.
At this temperature, a pork shoulder should take about 40 minutes per pound to cook. The time it takes will vary greatly, depending upon the temperature you maintain, but a 6-8 pound piece of meat will generally be done in about 4 hours of cooking time. Again, by cutting the meat in half, you dramatically reduce the cooking time.
Half-way through the cooking process, you can wrap your pork in foil. The foil will speed up the cooking process, eliminates the need to continuously add wood for smoke, and helps to maintain the moisture of the meat. The juices collected in the foil can also be added back into the pulled pork for additional moisture and flavor at the end. The fat in the pork will also ensure that the meat stays moist, but you may want to add a little apple juice or glaze your pork with some barbecue sauce when foiling. You simply can’t go wrong with adding your favorite flavors along the way.
Once the meat reaches 165°F, you may safely serve it, but you want to let the pork cook to an internal temperature of 185-190°F. This will ensure tender, juicy meat that is easy to pull. Once done, the blade bone should easily pull away from the meat and you can pull the pork apart with your fingers. Be careful when pulling pork, as it is very hot and can burn your fingers. I recommend wearing heat resistant rubber gloves (easily found at any home improvement store). After pulling apart your pork shoulder and discarding any large pieces of fat, lightly mix in your favorite sauce if you choose, but don’t overdo it - you’ll be amazed at how the flavors of the smoke and rub will allow this pork to stand on its own.
Making your own pulled pork may take a little time, but it is well worth the effort. Gone will be the days of purchasing pre-made pork in heavy barbecue sauces at the deli or meat counter once you discover how amazing this piece of meat can be. A perfect item for the backyard grill while doing your spring yard work, pulled pork is not only a crowd-pleaser, it is a true art that, in little time, you can be proud to have mastered!
Keep on grillin’!

